I made my first quilt a few weeks ago! I have so many favorite fabrics from the ones I've gathered over the past few years, but there are only so many bags I can use. I wanted something useful for our home, that would make it easy to see all these patterns and colors that I love. So I dug up this tutorial I pinned ages ago (with no intention to ever actually use), and decided to try it out.
Once I got over my fear that nothing would even come close to lining up, it was a pretty enjoyable project (with the help of like fifteen Grey's Anatomy episodes). Once I had everything sewn together, the batting sandwiched, and my hand quilting done, I wasn't worried about the binding at all. And then I realized immediately I was scared of the wrong thing the whole time. Because my binding job is so, so wack. Especially on the backside. So enjoy these nice, not-to-close photos.
I do love this quilt, though. And the second I finished it and sat on the couch and covered myself up with it, I thought about making so many more really awesome quilts with all the fabrics I've ever loved. And then I thought about not doing that.
Showing posts with label DIY. Show all posts
Monday, July 15, 2013
Wednesday, March 27, 2013
DIY PLASTIC LACE WOVEN CLOTHES HANGERS
This is my new favorite DIY because they are really fun to come up with designs and make...and I've always wanted to have a use for this plastic lace that's not these. They take a little while to finish, so it's a perfect project to work on while watching a good movie or show. I'm planning on using these for display purposes eventually, but they are actually really good to hang clothes on because the plastic adds a little traction. In a set, they would also make really unique gifts. Here's what you'll need:
Duck tape the pieces of lace to the back side to secure it while you wrap and weave your design. I wrap my hangers from left to right, so I taped my lace to the back of the left side.
Tuck a piece of your wrapping lace under the taped pieces coming out diagonally so it catches a little bit of the tape to hold it into place. Start wrapping.
Start your wrapping with six or so times around the hanger to secure everything, then begin your weaving. I chose a really simple pattern to show the process, but it's really easy to come up with other ones and play around. Just alternate wrapping over and under the pieces going across to come up with a pattern.
Keep wrapping and weaving across your hanger. Make sure the lace on the back of your hanger isn't twisted as you go.
Once you finish your weaving at the end of the hanger, tape the across pieces to the back, like you did in the beginning. Finish wrapping to the end, tuck the lace under the across pieces, and trim.
If you plan on using these for regular use hanging clothes, I would probably use a dab of clear clue to secure everything at both ends in addition to tucking the lace under. So there you go, a fairly frivolous, somewhat time-consuming, yet fun DIY for you! I hope you enjoy. Let me know if you make some - I'd love to see your designs!
supplies:
simple wooden hangers (I got all mine at the thrift store - they were covered and stuffed with satin, and I just cut all of it off)
plastic craft lace
duck tape
scissors
First, plan your pattern and decide what colors to use. It's easier to come up with patterns after you've woven one so you can see how the wrapping and weaving works. Cut the lace that will be going across your hanger to make the pattern. Make sure you cut enough to go across including the contour of the hanger. You'll also need about two inches hanging off each end.Duck tape the pieces of lace to the back side to secure it while you wrap and weave your design. I wrap my hangers from left to right, so I taped my lace to the back of the left side.
Tuck a piece of your wrapping lace under the taped pieces coming out diagonally so it catches a little bit of the tape to hold it into place. Start wrapping.
Start your wrapping with six or so times around the hanger to secure everything, then begin your weaving. I chose a really simple pattern to show the process, but it's really easy to come up with other ones and play around. Just alternate wrapping over and under the pieces going across to come up with a pattern.
Keep wrapping and weaving across your hanger. Make sure the lace on the back of your hanger isn't twisted as you go.
Once you finish your weaving at the end of the hanger, tape the across pieces to the back, like you did in the beginning. Finish wrapping to the end, tuck the lace under the across pieces, and trim.
If you plan on using these for regular use hanging clothes, I would probably use a dab of clear clue to secure everything at both ends in addition to tucking the lace under. So there you go, a fairly frivolous, somewhat time-consuming, yet fun DIY for you! I hope you enjoy. Let me know if you make some - I'd love to see your designs!
Tuesday, February 26, 2013
QUICK DIY: VINTAGE POSTCARD WALL ART
I've always loved looking through stacks of old postcards at antique malls, but it's easy to end up with a stack at home and nothing to do with them. If you keep an eye out for postcards with the same subject, like buildings or beaches, you can frame them together and make some nice and easy wall art.
supplies needed:
vintage postcards (look for them at antique malls or flea markets)
frame (I chose a cheap, simple clip frame)
masking or washi tape
double-sided tape
paper for your background
scissors
First you'll need to make the background to put your postcards on. I pieced sheets of old graph paper together because it looked nice with the blues in my postcards. You can also just turn over the paper that comes in the frame if you want plain white.
Line up all your postcards, then tape them down. Using masking or washi tape is good because it's easy to remove from the postcards if you ever want to use them for something else.
Then you'll have something nice and new (and kind of old) to hang in your home. I do love a nice and quick project.
Wednesday, February 13, 2013
VINTAGE DECAL JARS
Yesterday I shared some old bird decals that I recently thrifted. While tidying up the apartment, I found these vintage-style jars that I got at Target, and I though hey were perfect for this. It's always a little daunting to use something, like these decals, that you might completely ruin and have no way of getting more of. But I went for it. And luckily they weren't that hard to put on. love how they came out.
I have this one cardinal left - any ideas what I should put him on?
Tuesday, January 29, 2013
DIY INSTAGRAM PHOTO CUBE
I recently got a whole batch of phone photos printed and wanted a different way to keep them around. My grandparents had this square picture frame, and I loved to hold it and turn it to see all the different pictures (of myself and my brother as 90's children). So I made these photo cubes. These would be a great Valentine's Day gift if you're into that. For one, I used pictures that I have taken on different trips with Douglas, and on the other, some good ol' couple shots.
supplies:
wooden cube (got mine from Michaels)
photo-safe spray adhesive
instagram prints (I use PostalPix)
exacto knife
cutting mat
1// Lay something down to protect your work surface. Spray an even layer of adhesive on one side of the block. Spray a light layer onto your first picture, too, then stick onto the block. Keep in mind what parts of your picture you want to show if you're going to trim it down. 2// If your pictures need it, trim off the excess with an exacto knife. My block was 3.5" and my photos were 4". 3// Repeat on all sides of the block, being careful not to spray already attached photos with adhesive.You'lll end up with this - and a nice photo cube!
Wednesday, January 23, 2013
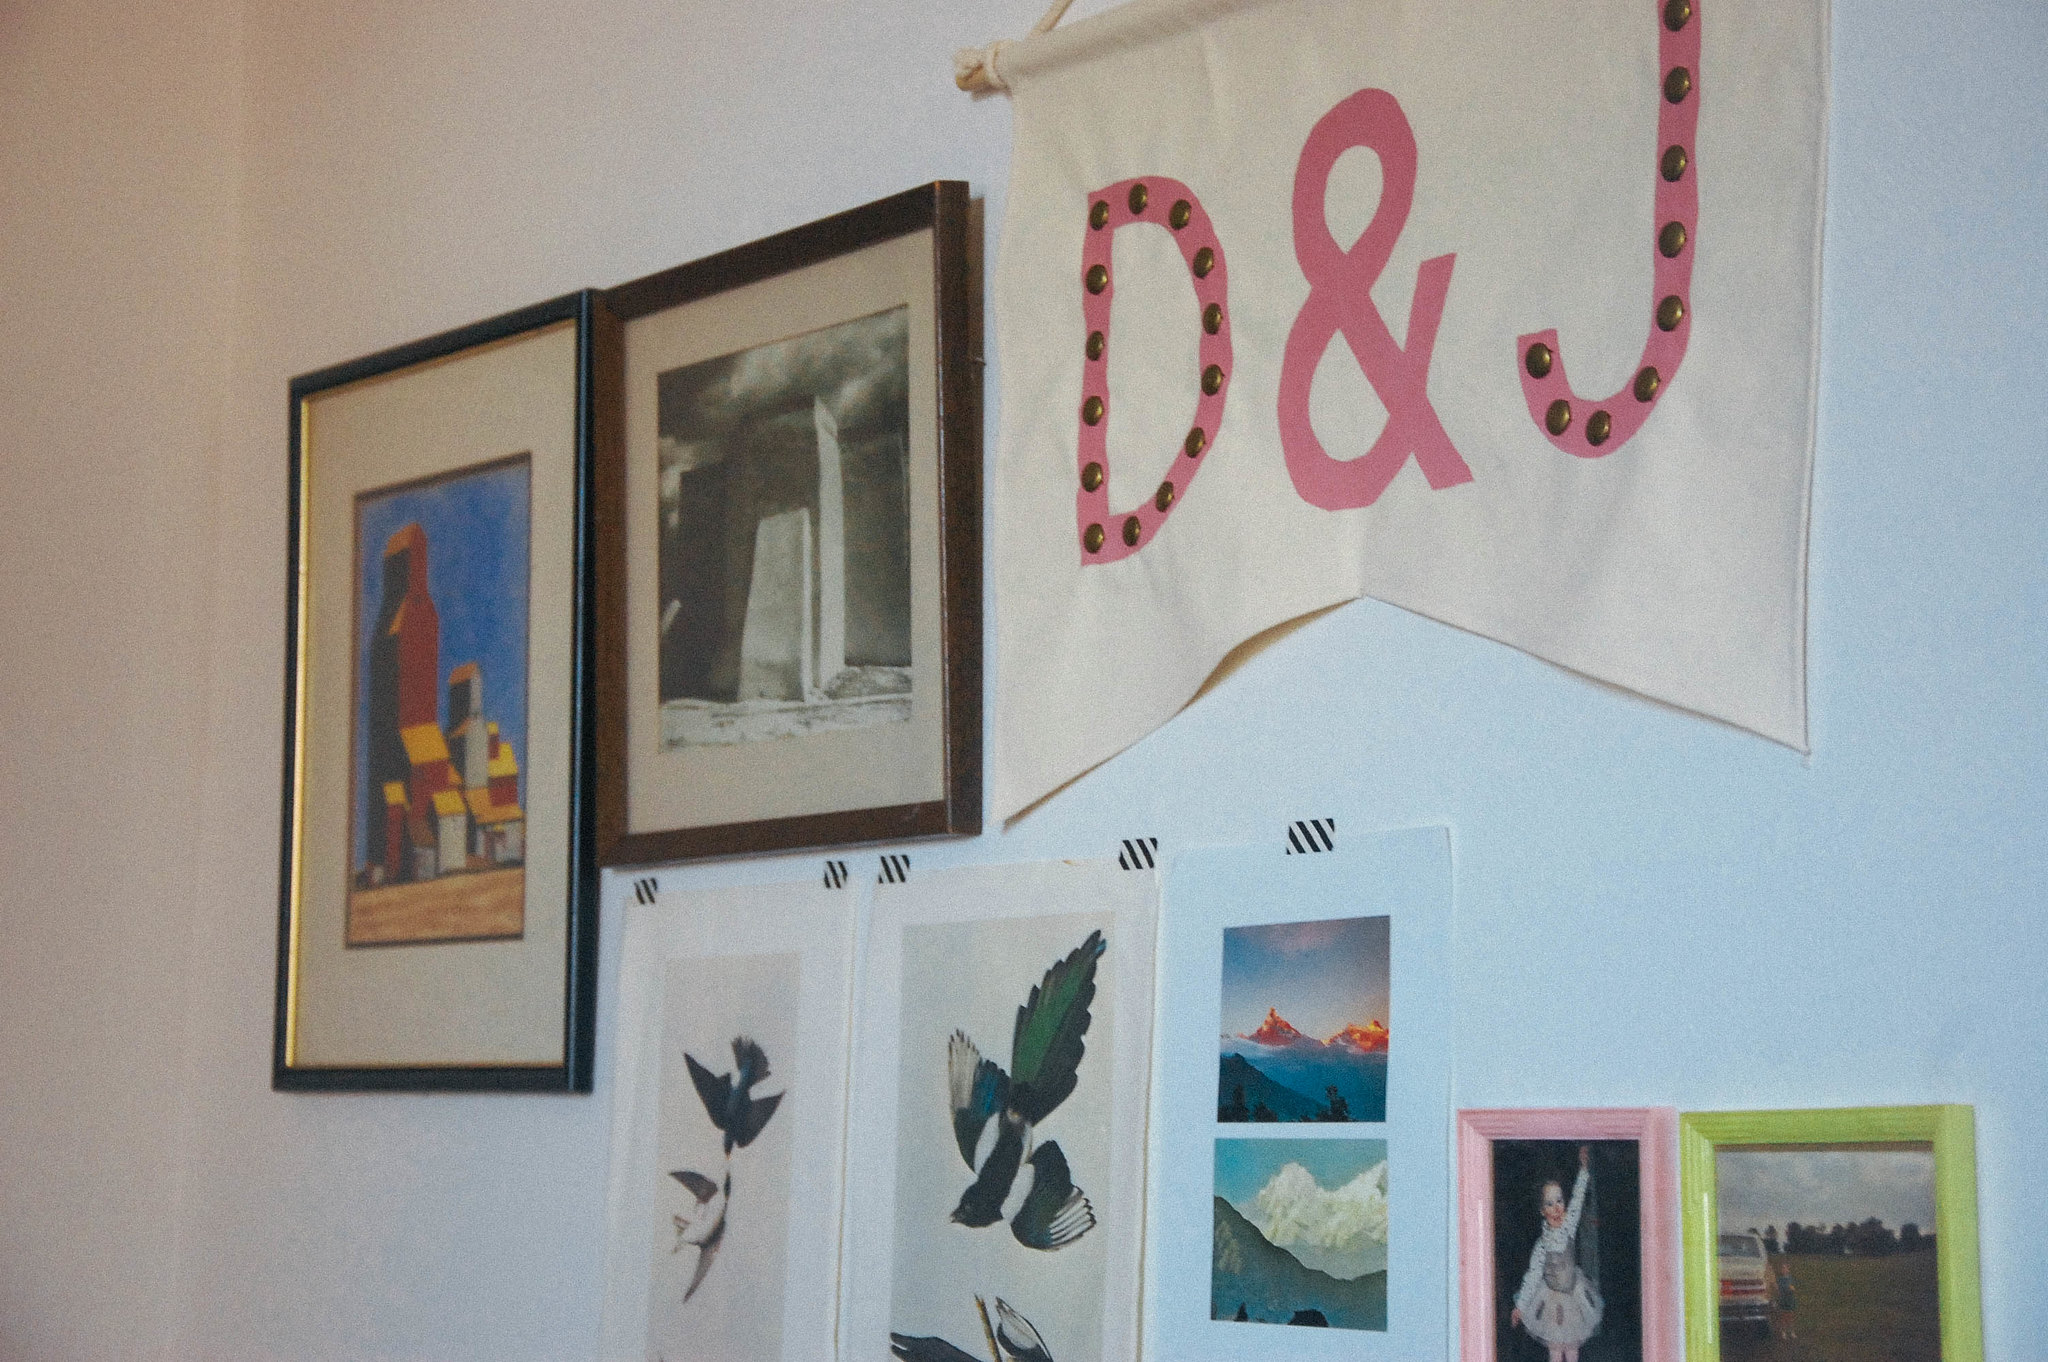
DIY STUDDED INITIAL BANNER
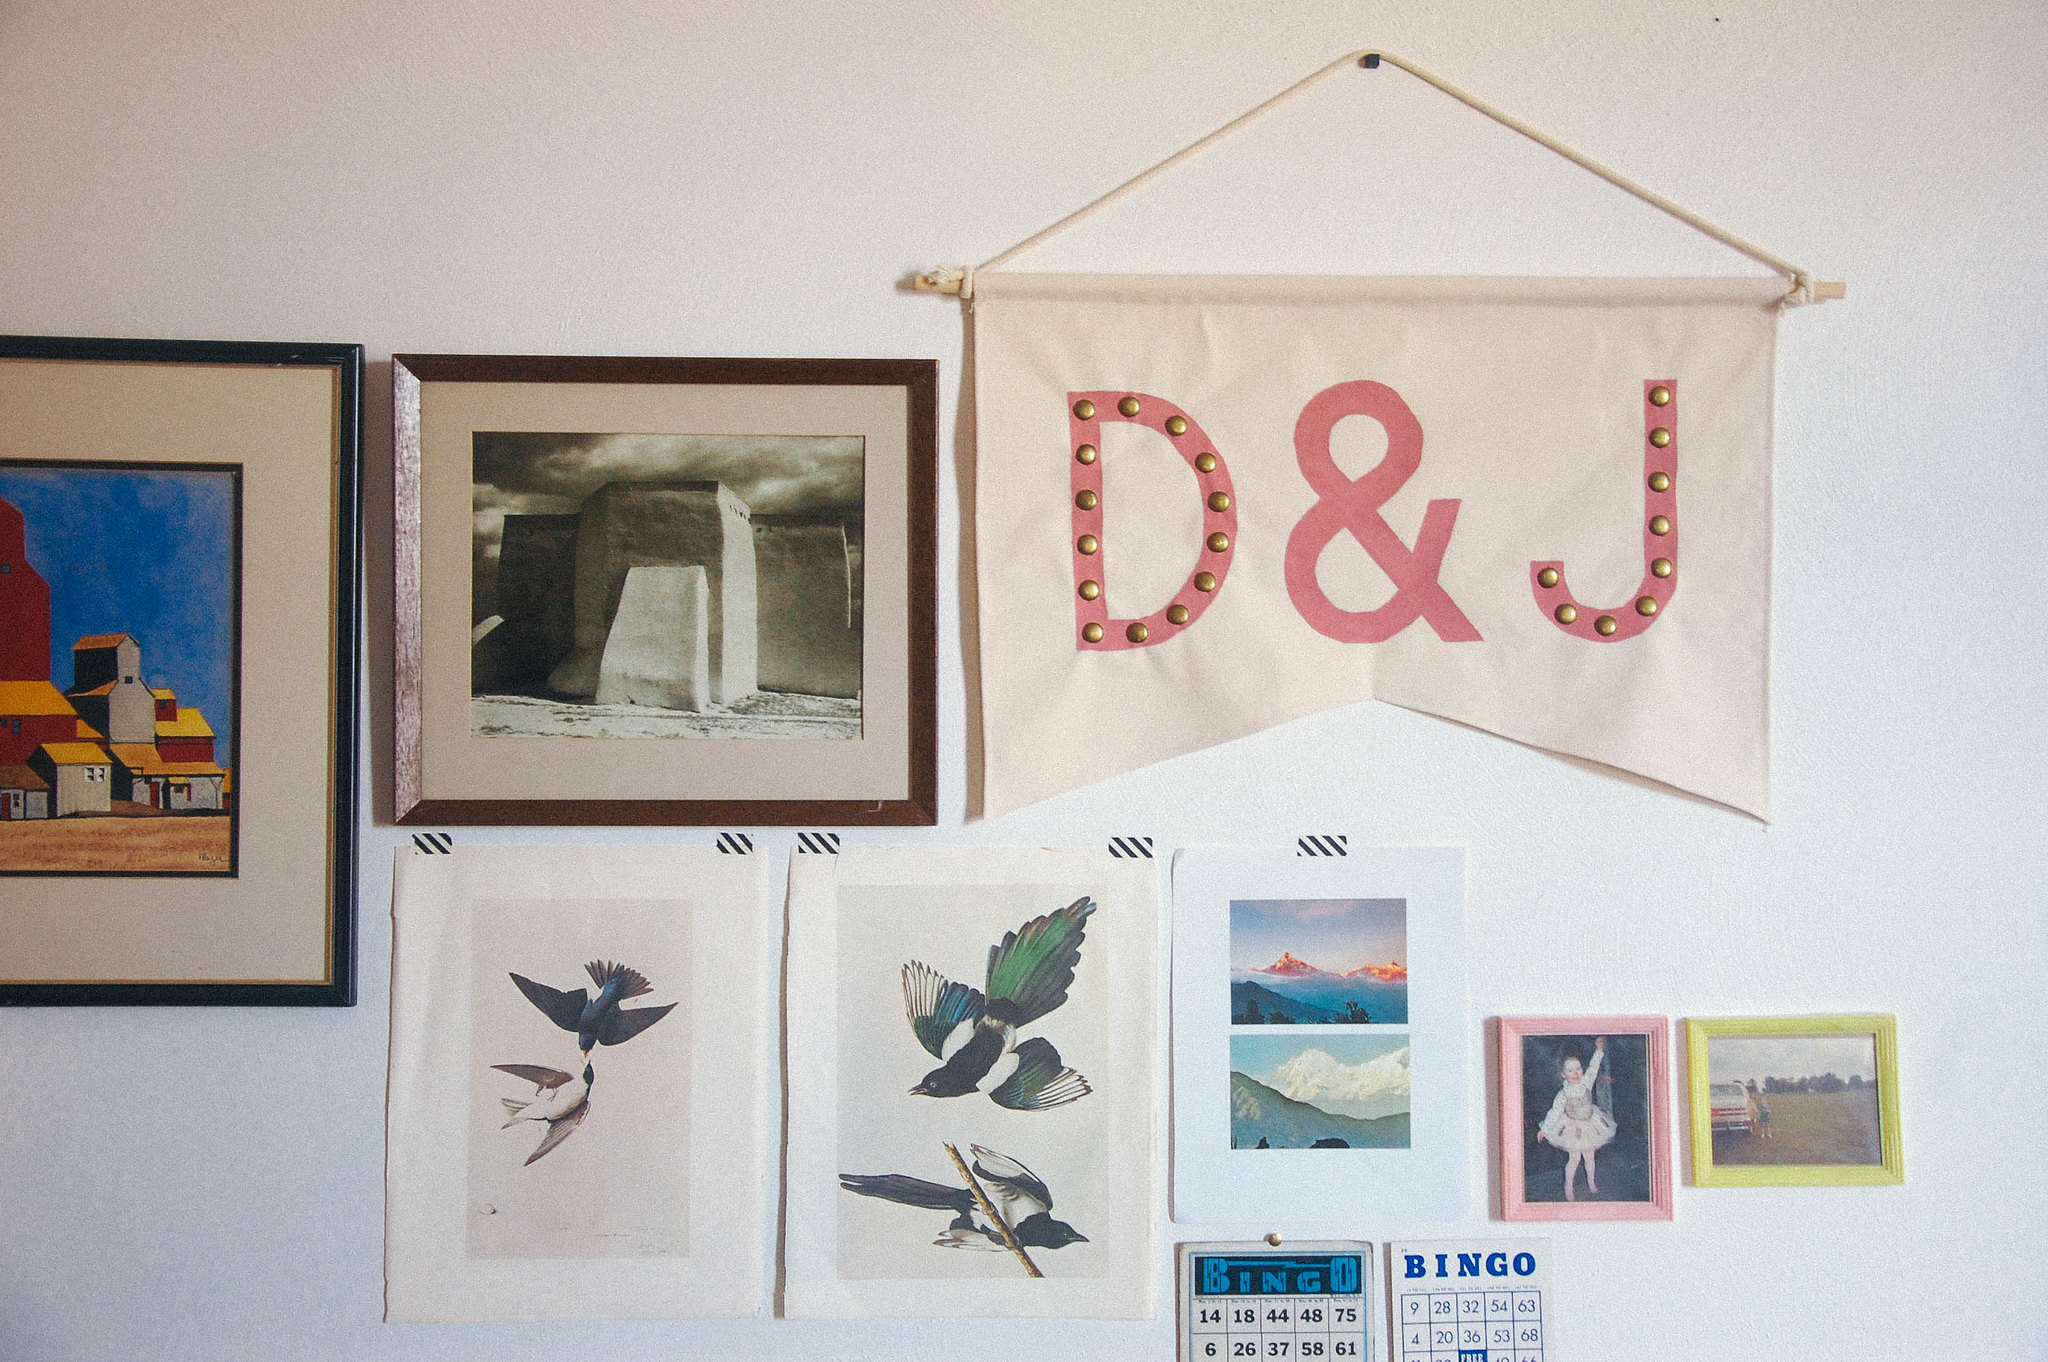
I have been wanting to make something to hang in our living room wall that added a personal touch to the space. I really like banners and initial things...so this is what I came up with.
supplies:
canvas material
wooden dowel
craft paint
cotton rope
studs (available here)
paintbrushes
print-out of letters to trace
scissors
sewing machine
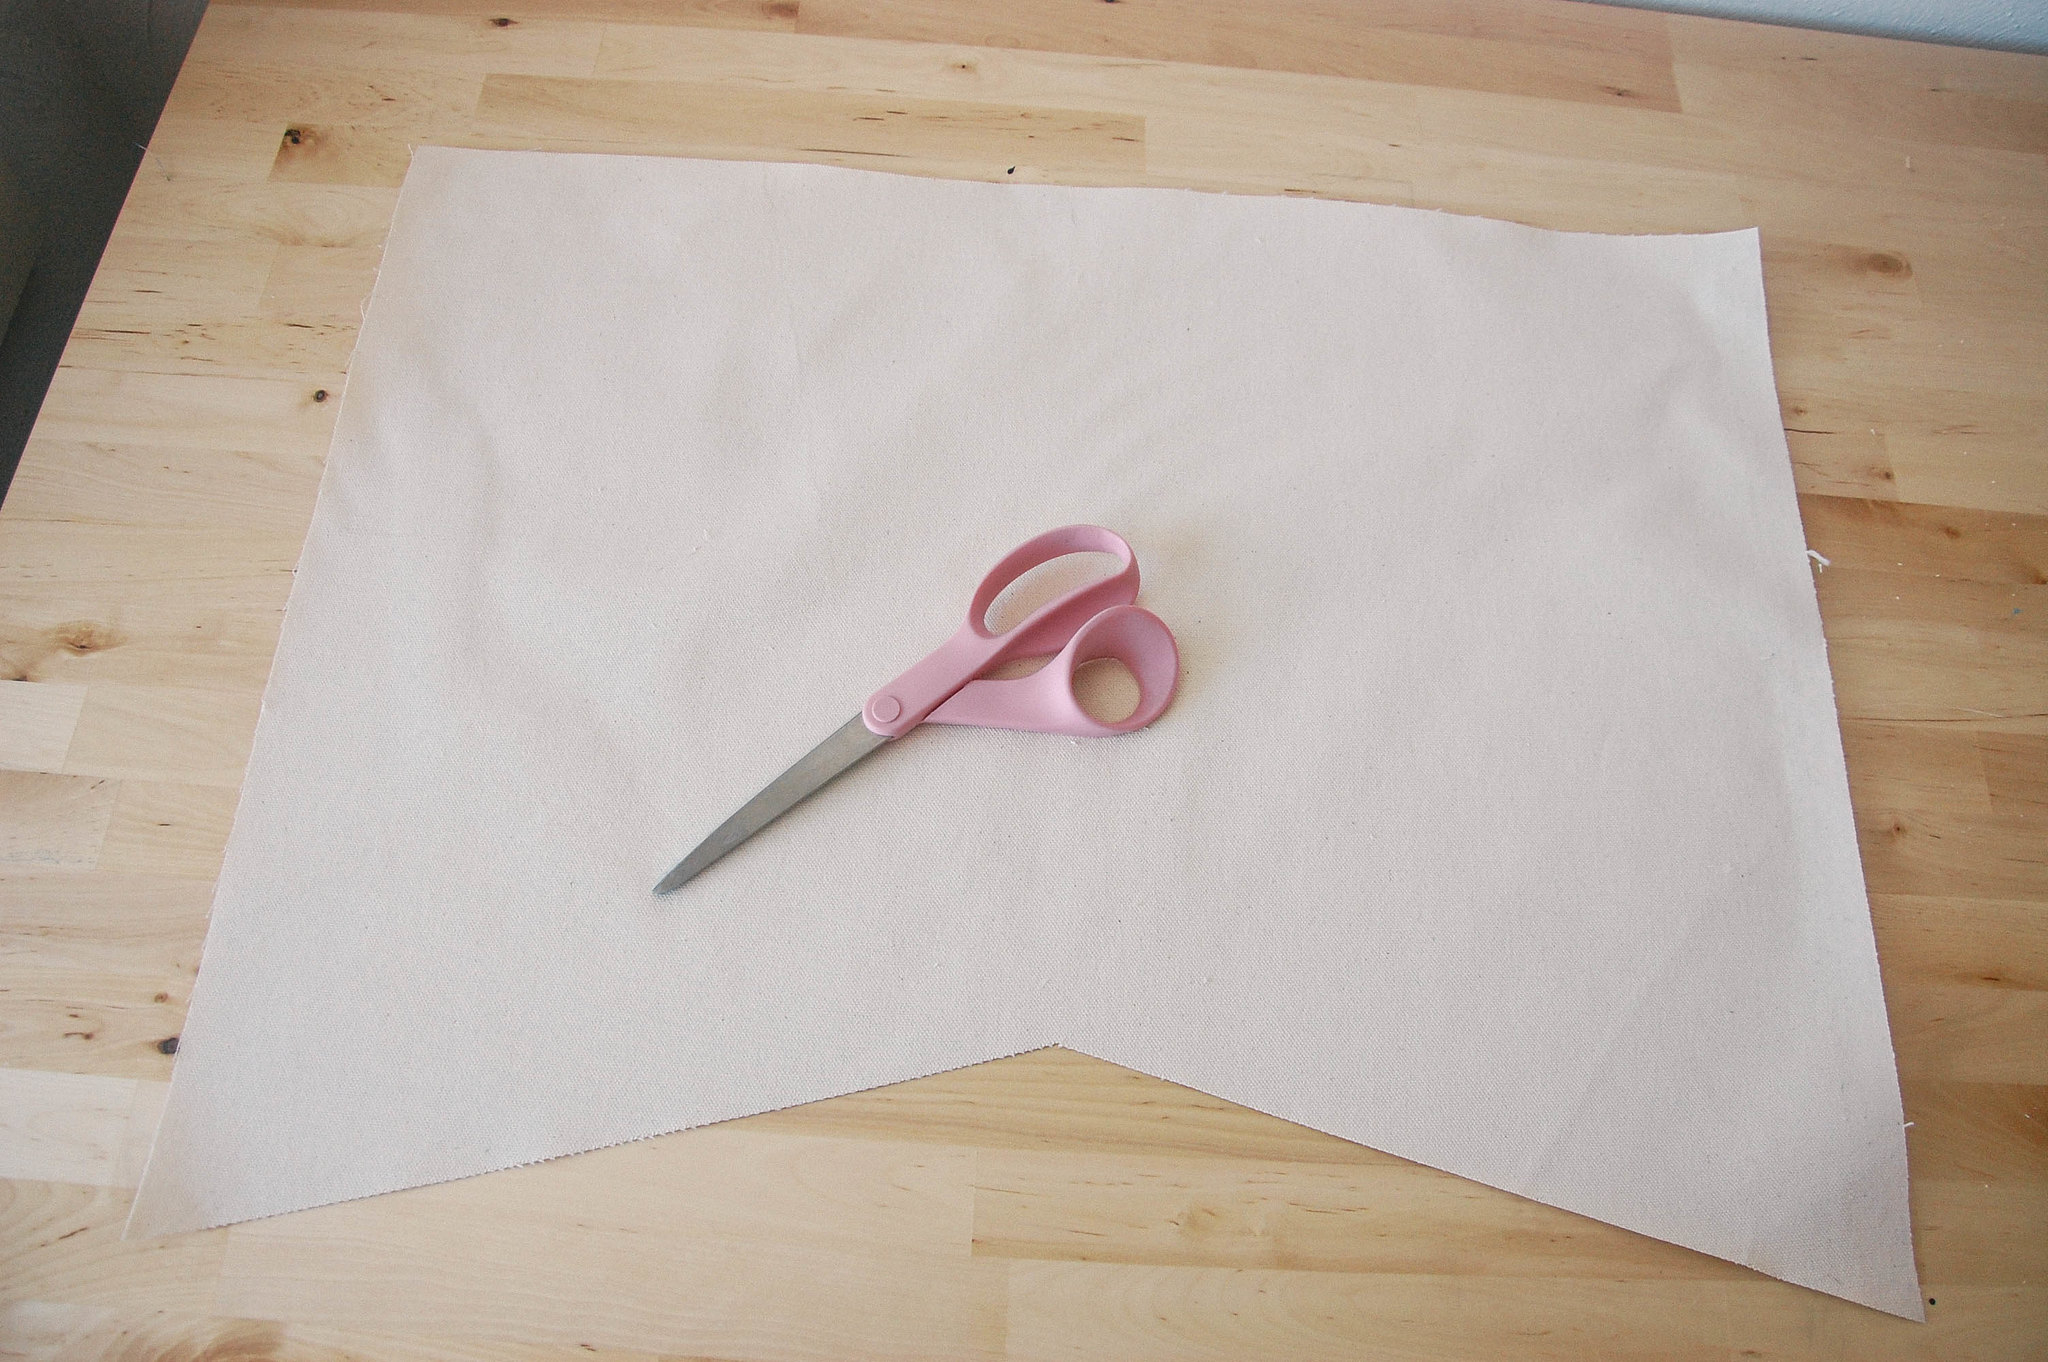
Start by cutting out the shape you want your banner to be. I didn't make a pattern - I just placed my letters on the canvas and used them to judge how big to make the banner. Keep in mind that you will be folding in all the edges about a half an inch to stop fraying.
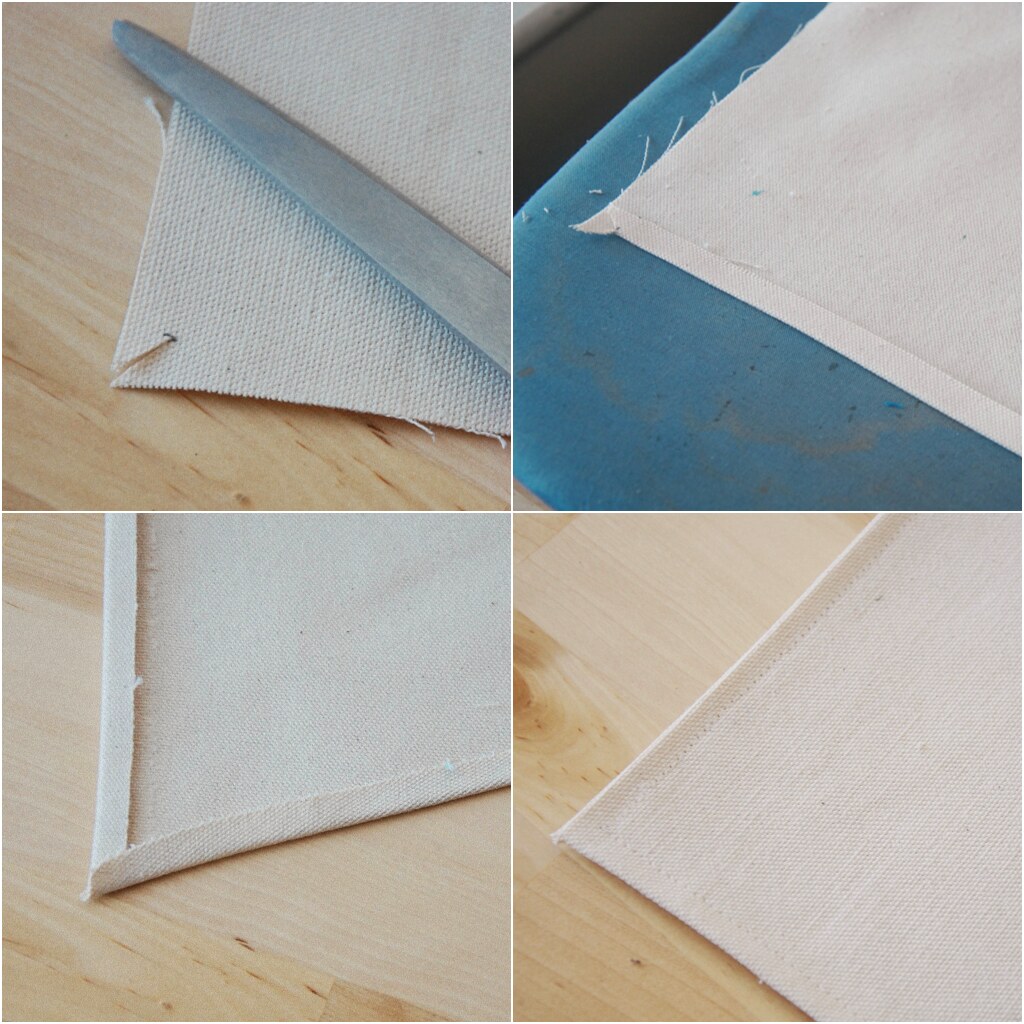
Next, cut into all your corners a half-inch. Then fold and iron all your sides in about a half-inch as well. Trim any corners you need to so they don't stick out on the front. After all the sides are ironed down, stitch around the edges, making sure to catch the folded fabric on the back. Then everything will look nice and neat on the front.Saw your dowel to the right size if necessary. Fold your fabric over the dowel to see how much space it will need to slide into the fabric. Pin that fold over and sew it down, leaving enough space for the dowel.
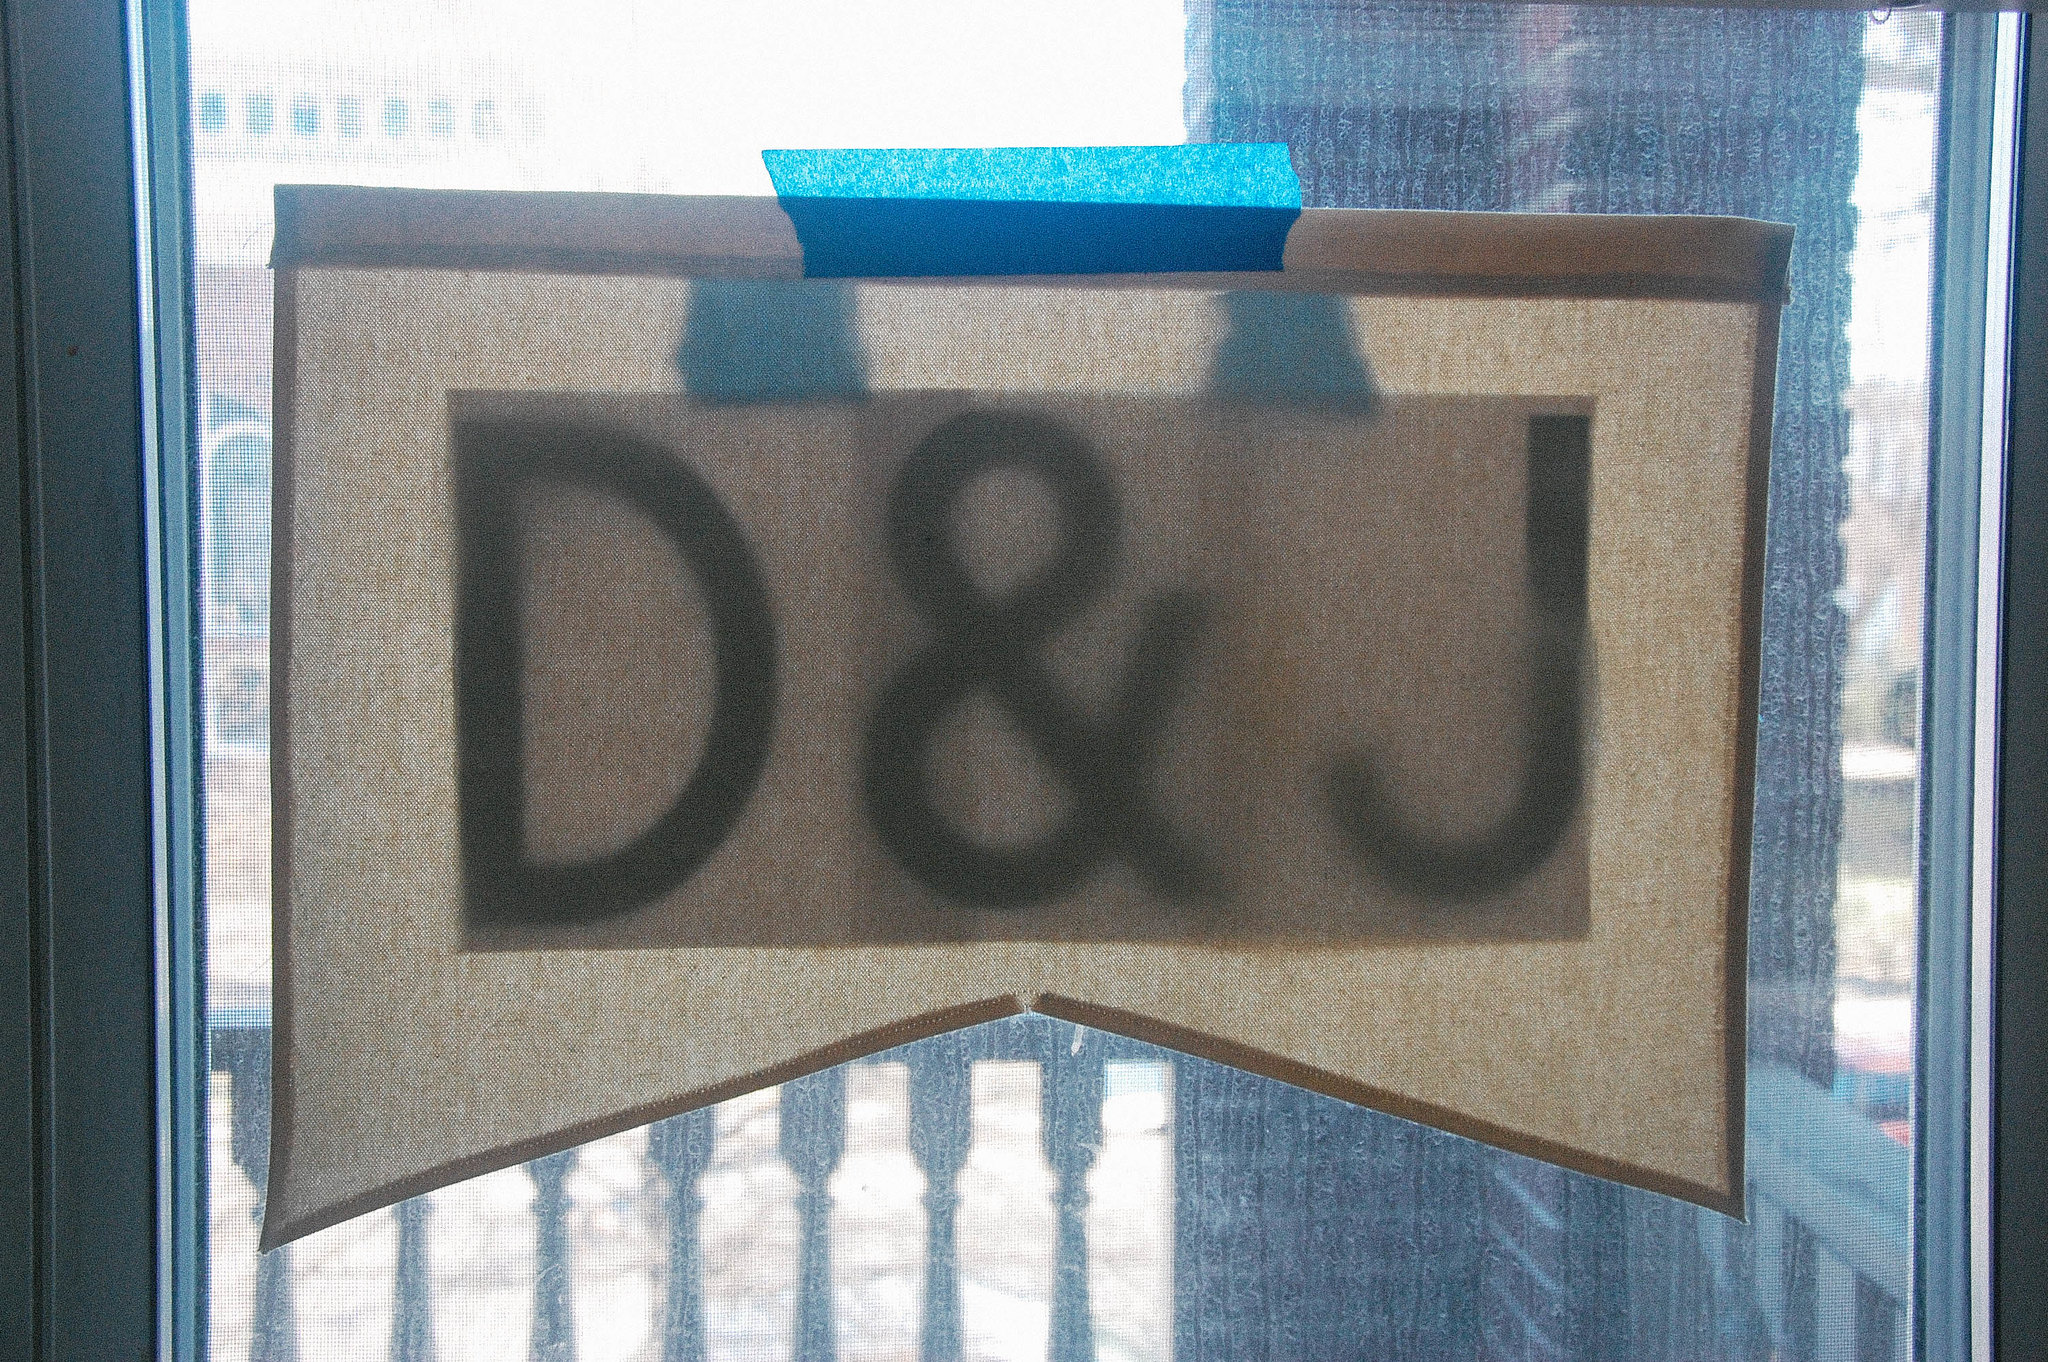
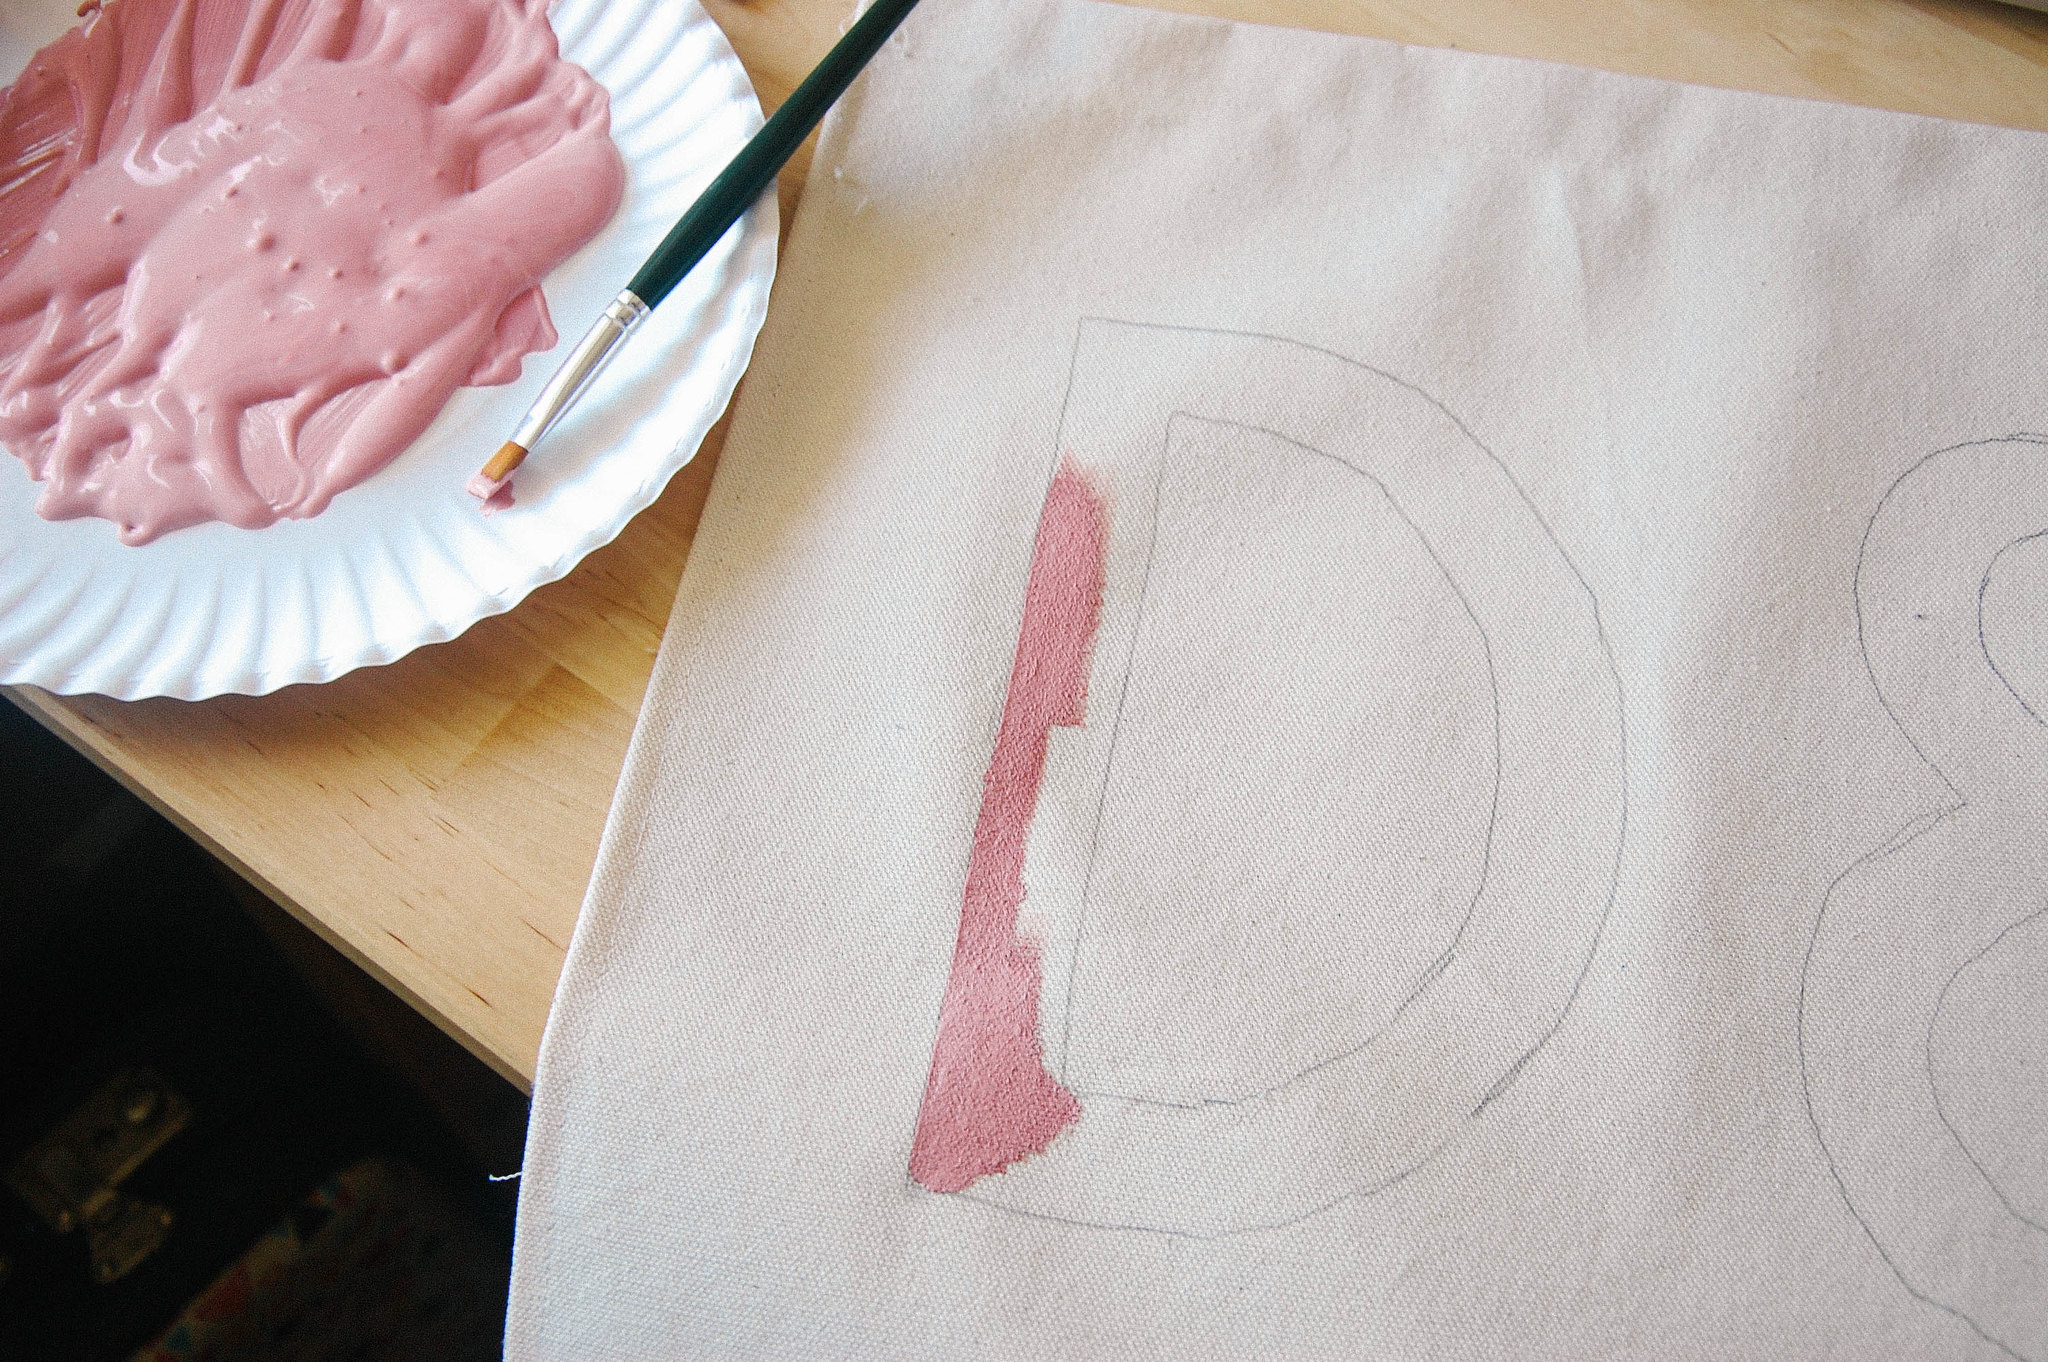
Trace your letters (or freehand them if you're wild like that). I taped the letters and banner onto a window to make it easier. It also helps you see exactly where you're putting the letters.
Paint all your letters and let dry completely. My canvas wrinkled up when the paint dried, so I had to iron if afterwards.
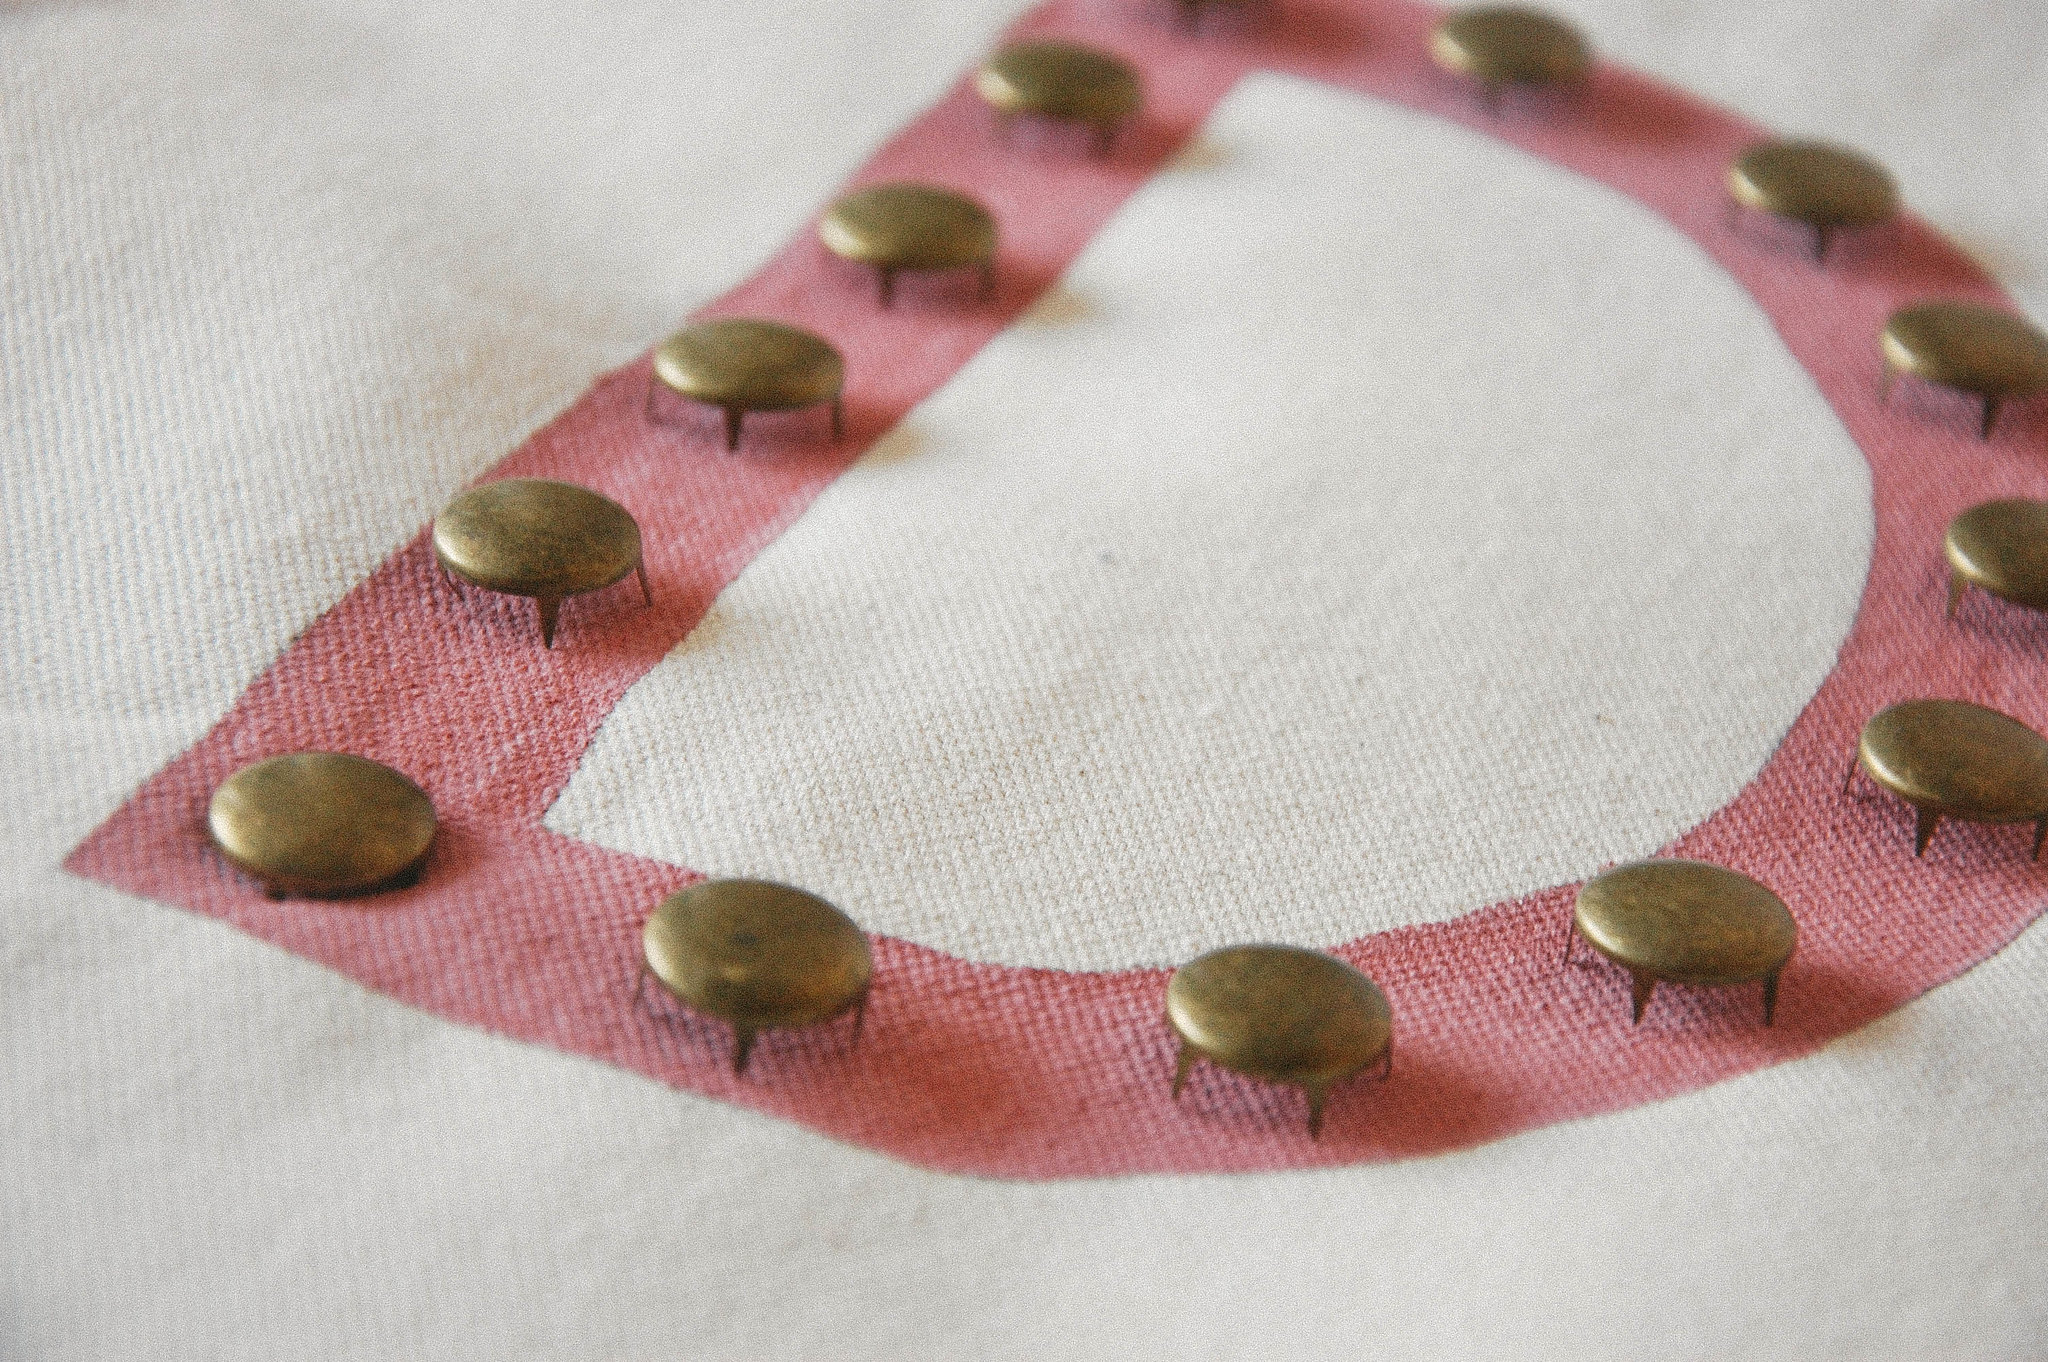
Lay out all your studs to get the spacing right then start attaching them to the fabric.
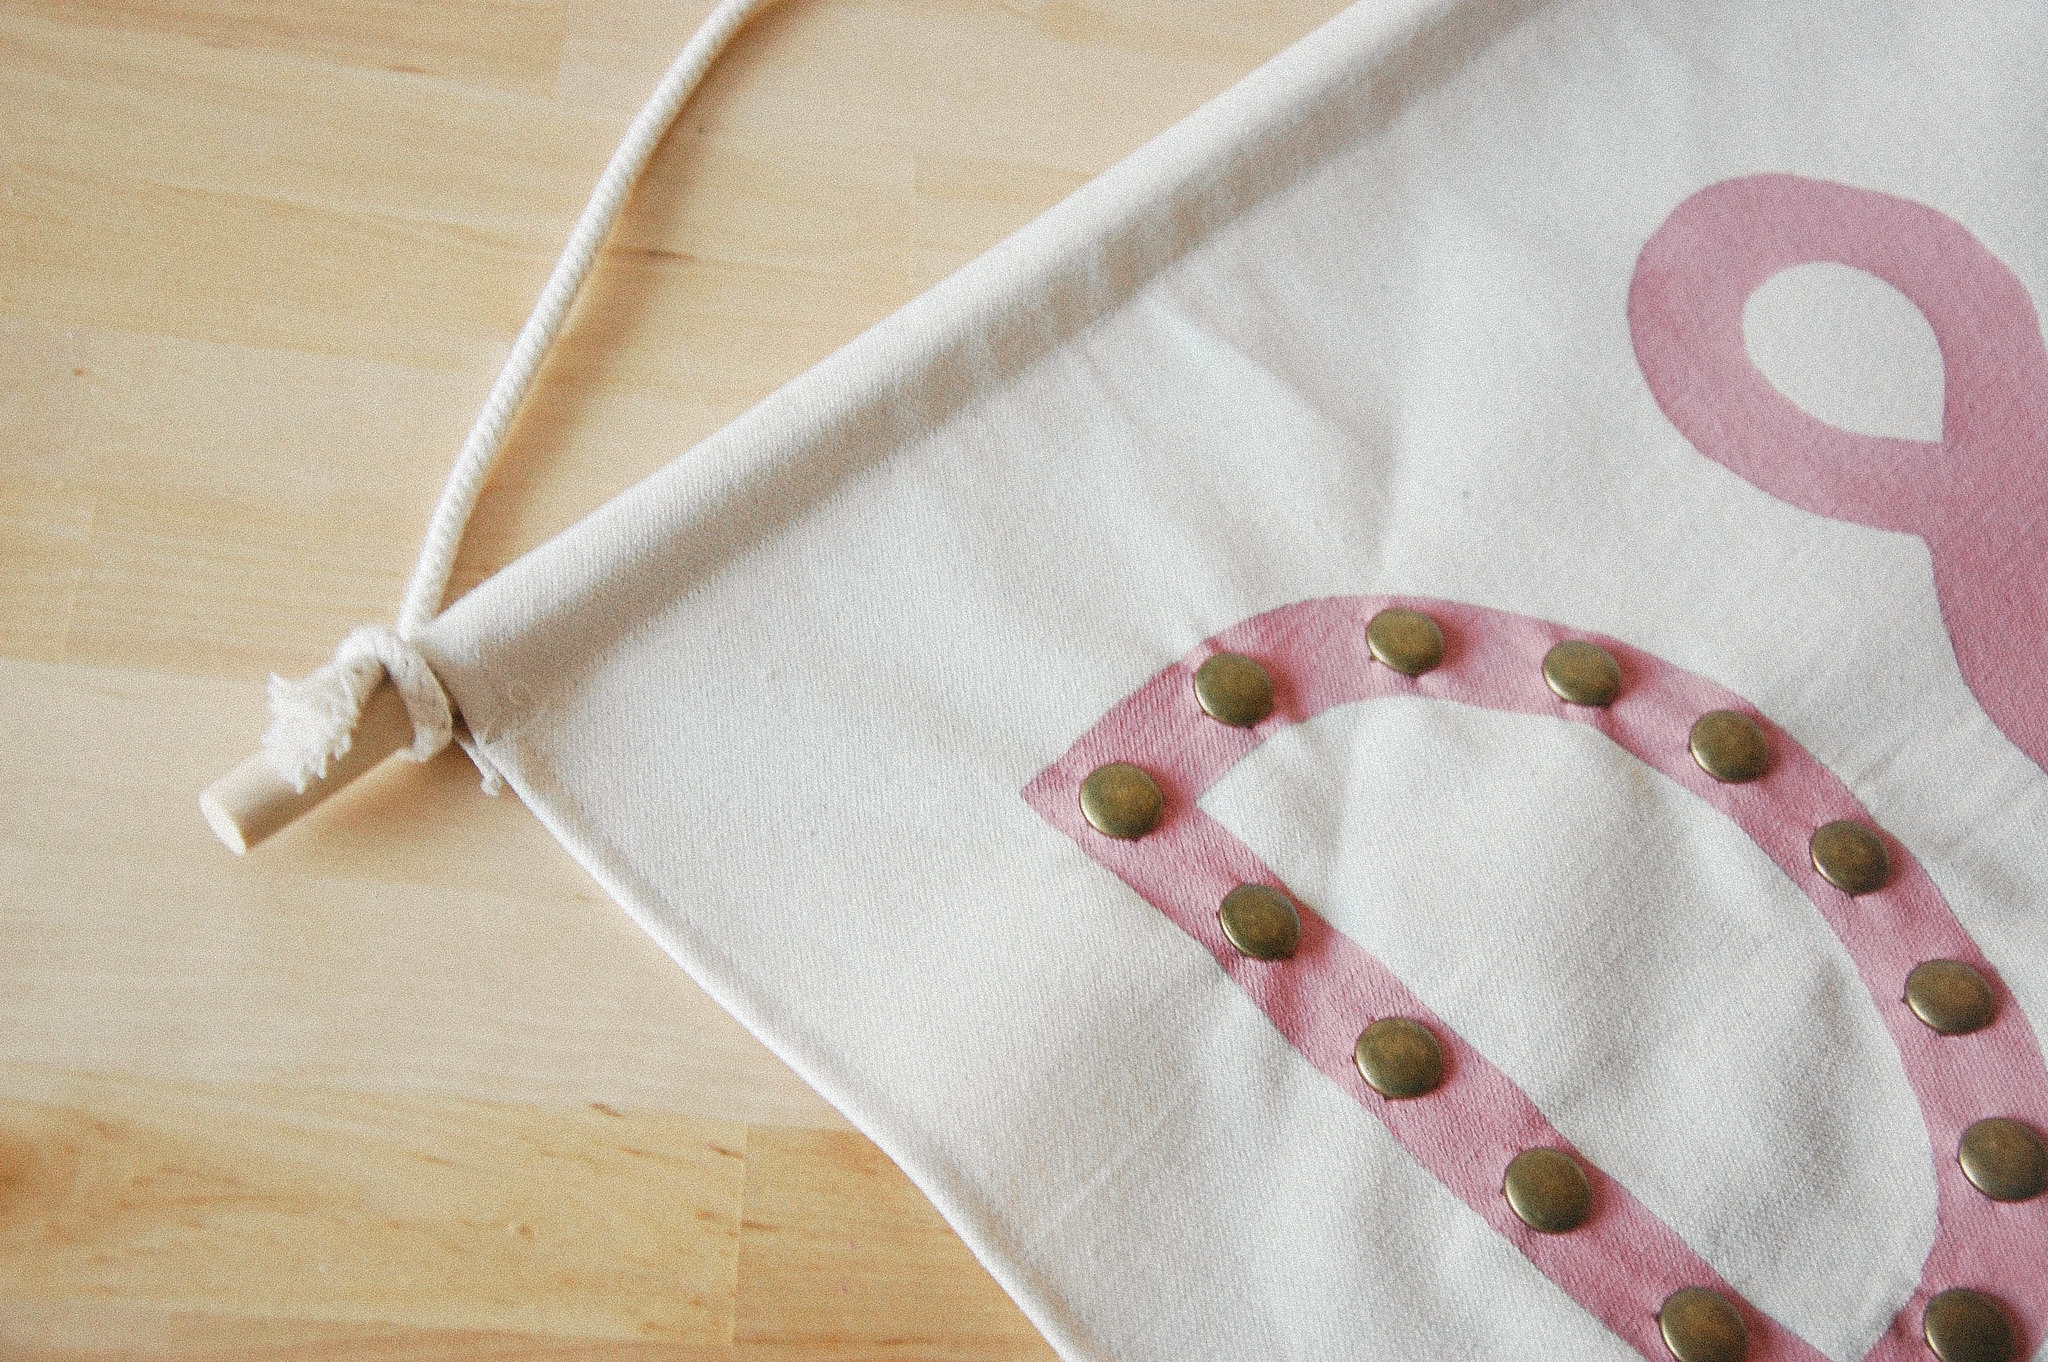
Tie your rope onto the dowel and hang it up!
Tuesday, January 8, 2013
DIY PEN + PENCIL ROLL-UP
I am obviously that person that always has way too many writing utensils to keep track of, so it's always good for me to have another way to keep up with them. This pen roll-up is a fairly quick sewing project that you can alter to fit whatever utensils you need to store.
supplies:
contrasting fabrics (I used vintage upholstery fabric and canvas because of their thickness)
trim/yarn/ribbon (long enough to wrap around the roll a few times)
button (one with a shank works best here)
sewing machine
note: I didn't make a pattern for this. Instead I laid out what pens I planned to use and estimated what size the roll would need to be to hold those pens.
Once you have your main pieces and pocket pieces cut out, pin the like pieces together, right sides together. You're going to sew around the edges of both, leaving a hole to turn them through. I drew where you will sew on the canvas piece in pencil. It's the same for the main piece, too.Important! Before you sew up the main piece, put your piece of trim inside the two pieces, with a little bit sticking out. This way everything will already be attached when you turn it right side out. When you sew over this part you might want to backstitch over it a few times for reinforcement.
Once you have turned everything, you can topstitch both pieces all the way around, close to the edges. It looks real slick and holds everything together nicely. Plus, it's a good way to close up the holes your turned the pieces through.
Don't forget to sew on your button. I put mine right near where the trim starts so it won't get wrapped up in the roll.
Put your pens on your pocket piece to estimate where you will sew your slot lines.
Mark the lines lightly with a pencil. Pin the piece down where you want it on the main piece, and sew down each line. Also sew around the sides and bottom of the pocket but not the top!
note: if you do the steps in this order, the stitching from attaching the pocket will be exposed on the back of the roll-up - I did it this way because I like exposed stitching. If you want your stitches hidden, sew the pen pocket and slots onto one of the main pieces, then sew the two main pieces together. That way your stitches will be hidden inside when you turn it right-side-out.
And then you will have a nice little roll-up to hold all of your pens/pencils/whatever. On another note, I cannot stop with this pale pink-mustard yellow color combination. Enjoy!
Subscribe to:
Posts (Atom)