
One of the first crafts that I fell in love with was origami. When I was 8 or 9 I had this little kit that came with different colored paper and an instruction book. I made the forms in that book so many times I could do most of them by memory back then. By folding fabric instead of paper, you can make a durable little box to add some cute organization to your day. Here's what you'll need:
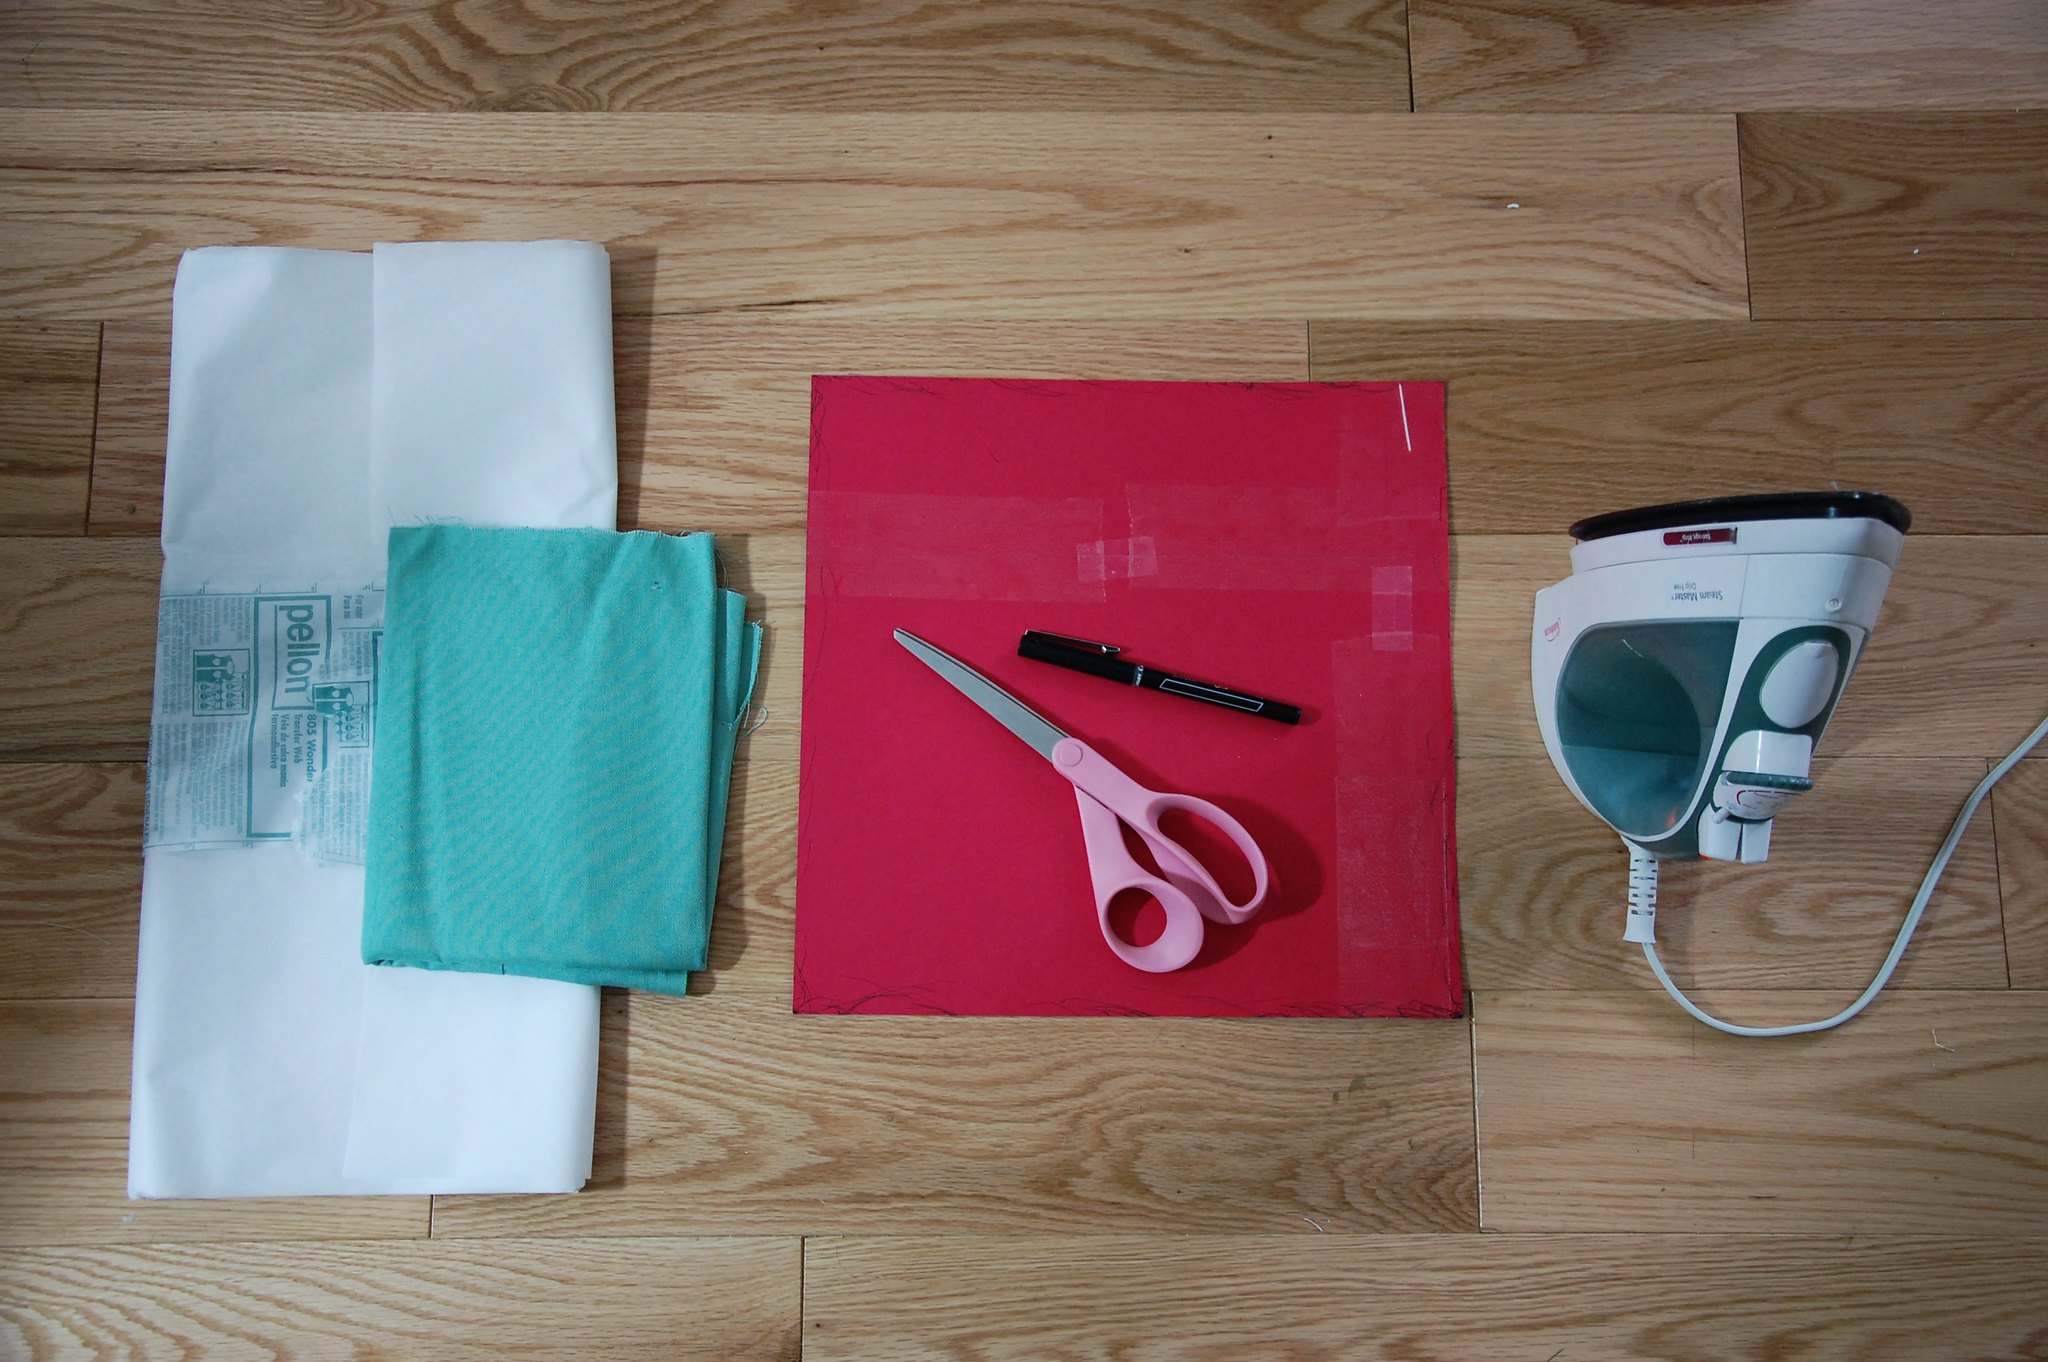

fabric // fusible paper interfacing (above) // square pattern // pen // scissors // iron //
for the larger box I used a 17" square, the smaller is a 12" square
I bought my paper interfacing at Walmart for less than $2/yard

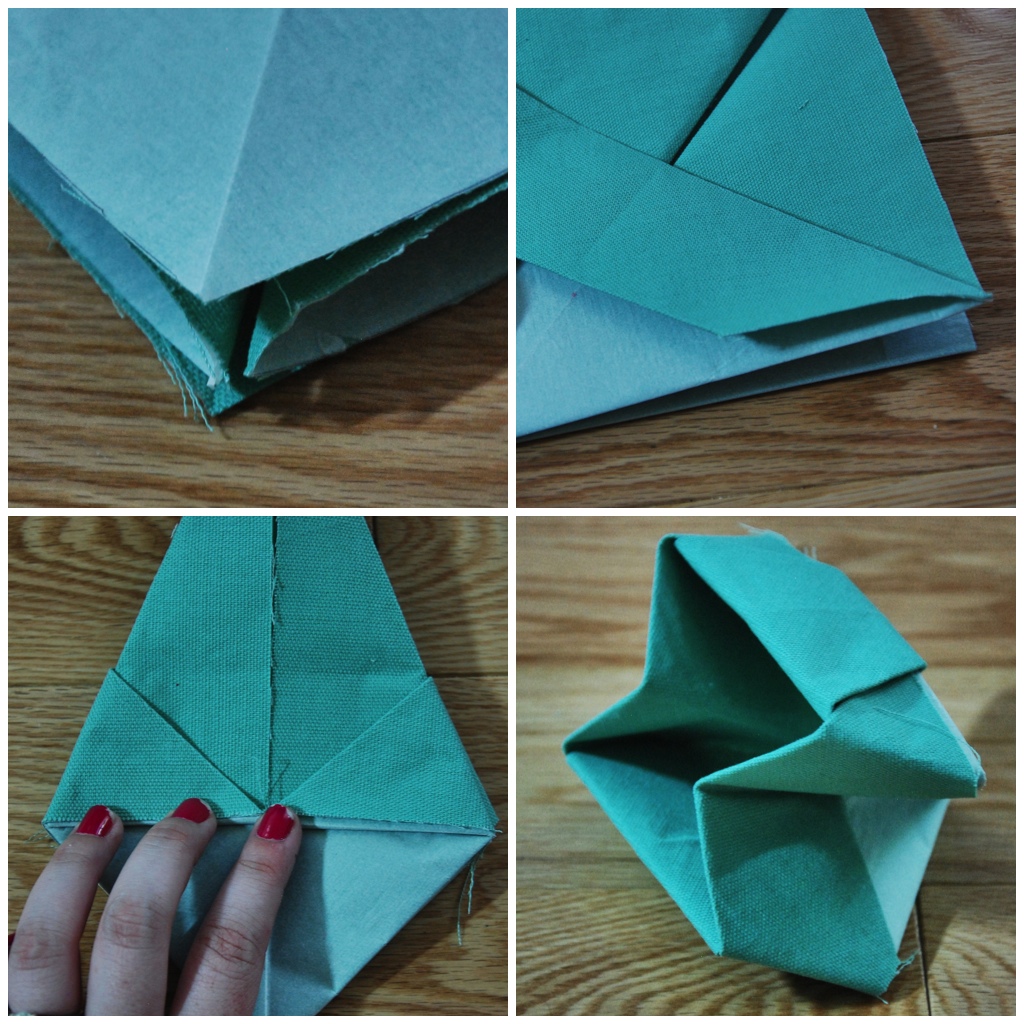
//make sure your pattern is as close to a perfect square as you can get
//iron on your interfacing carefully and make sure there are no spots that aren't fused to avoid lumpiness
//for every new fold you make, go over the crease with the dull edge of your scissors to make it more prominent
//work on a hard, flat surface so you can bare down and make your folds better
//like the instructions say, make sure you start with the wrong side facing out (interfacing side), so your box ends up with the pretty fabric side showing


I love this a lot. I need a couple of giant boxes for my closet and may have to give this a shot. Thanks for sharing this!
ReplyDeleteOh I love this! I can't wait to try!
ReplyDeleteThis comment has been removed by the author.
ReplyDelete